Tuesday, March 31, 2009
EASTER
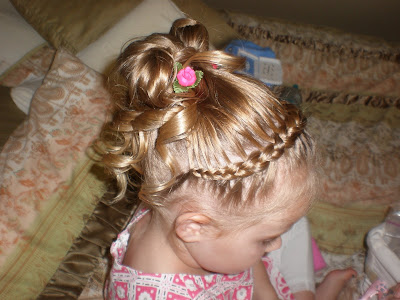
I have had Easter on my mind lately seeing that Easter is just around the corner. & I thought I would share what I was thinking would be some pretty hairdos. When I think of Easter sunday I think of beautiful Easter dresses with pretty hair in soft curls, flowers & headbands. I'm going off of what I posted last time because I had so many comments on it - I thought we could do another variation of the same style.
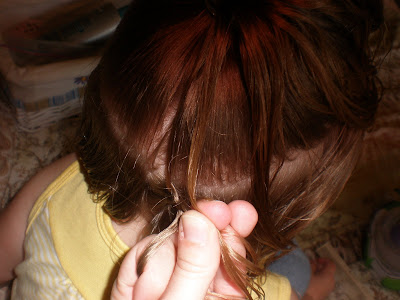
Part your headband just about 1/2 to 3/4 of the head & pull the rest into a pony tail. Split the pony in half & hold the bottom with a clip. That is what is going to be curled, the top is what is going into the braid.
Start braiding your headband just like the post below, bringing side pieces from the pony & the headband pulled out. I tried to keep the braid right over the part to keep an even line for me.
Thursday, March 26, 2009
Wednesday, March 25, 2009
Side Braid
First french braid across the front of her hair as shown below.

Next pull the rest of her hair to a side ponytail (on the side where the braid has ended)
Once the hair is in a ponytail make a messy bun of your choice.

Since my daughter is such a girl we added a flower to match her outfit. The flower is from Bybee Bows purchased at http://www.mom-stuff.com/

Next pull the rest of her hair to a side ponytail (on the side where the braid has ended)
Once the hair is in a ponytail make a messy bun of your choice.
Since my daughter is such a girl we added a flower to match her outfit. The flower is from Bybee Bows purchased at http://www.mom-stuff.com/
Here is a side shot of the finished product.
Monday, March 23, 2009
around the head headband
This was a fun one for us to do. It's a little bit different, but it was nice because her hair stay out of her face all day & it looks like a sweet little braided band.
Start by parting a circle around the head, leaving out a headband under the circle.
This is kind of hard to tell in the picture, but you start french braiding from the bottom-middle. Grab your three strands to start with from the hair that is out of the pony. Then as you braid, you bring small pieces from the pony tail from the one side & small pieces from the hair left out from the other side. You can either do inside out french braid or a regular french braid. I actually started with a regular french braid & didn't get very far, I felt it was hard to position my hands, so I stopped very quickly & redid with the inside-out french braid & it was very fast & much easier for my hands to hold the hair. But whatever works best for you - try it!
Thursday, March 19, 2009
Puffy Hairstyle
For your little ones who don't have much hair this is fun and looks really cute. Especially if your little one has a spunky attitude.
First part the top of her hair and pull it to one side in a ponytail as shown below.
Then part and pull the second one together with the first pony tail.
Now do the same for the third.
Wednesday, March 18, 2009
Tuesday, March 17, 2009
Saturday, March 14, 2009
Thursday, March 12, 2009
Ribbon Fun
For everyone who loves ribbons here is a fun idea to put a little spunk in your girls hair style.
I only have the finished product on this one, so I will explain how it is done.
First pull up the front bangs in an elastic. Then pull it through to make the twist. Tie the ribbon of your choice around the elastic. Part the remaining hair down the middle. Split the hair in the elastic into 2 pieces one for each side. To get the ribbon look just wrap it around one section of hair and put into a pigtail. Do the same for the other side. Then make a messy bun of your choice.
Here We Go!
Everyone Get READY SET HAIR!
I love to do my girls hair even though my youngest doesn't have much hair it is fun to share ideas on how to make them look cute. All girls have different kinds, types, and lengths of hair. That is the purpose of this blog is to share ideas and give ideas on how to do girls hair of all kinds. I get really tired of doing my girls hair the same way each weeks so lets get creative. Everyone get ready because here we go. Get ready for my next post that will follow is the first of many cute hairstyles.
Wednesday, March 11, 2009
an option for ribbon in the hair
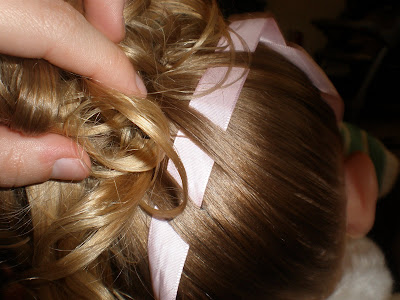
I used a bobby pin because I was in a rush. But if I would have taken the time - I would have grabbed a safety pin & pinned it to the ribbon - which I recommend. If you are going to use a bobby pin like I have in this picture, just slide the ribbon thru & make sure that it's thru enough to not come out.
I pulled her hair up & curled it & then pinned it up, which is not very convenient for putting a bow into it. But I love the look of a bow, it always finishes her hair off. So I thought this would be a cute way of adding your bow: Start weaving with the bobby pin or safety pin.
Saturday, March 7, 2009
Thursday, March 5, 2009
Twist Downs
This was super easy!! It's like doing a french braid but twisting instead. You just twist your piece while adding the pieces from the sides to make your way down.
Start at the top with on section, start twisting.

Start adding pieces from the sides to match along the same way of the twist.

Okay - for some reason - this is sideways even though I flipped it. But I don't have time to mess around with it right now so next time I'll make sure it's the right way:) Do both sides & when you get to the end of one, I added an elastic & then pinned it so the twist wouldn't let loose. Do the other side the same & bring them together with an elastic of course taking out the pins from holding it previously.
Start adding pieces from the sides to match along the same way of the twist.
Okay - for some reason - this is sideways even though I flipped it. But I don't have time to mess around with it right now so next time I'll make sure it's the right way:) Do both sides & when you get to the end of one, I added an elastic & then pinned it so the twist wouldn't let loose. Do the other side the same & bring them together with an elastic of course taking out the pins from holding it previously.
Tuesday, March 3, 2009
Golden Globes Hair---Nancy O'Dell
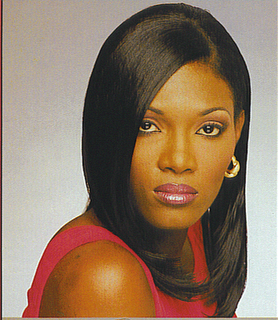
This is the look we are going for...now, to be fair, this is a delicate hairstyle. It works FANTASTIC on my oldest, who is a little less...um...playful. Playful is a good word for it.

We modified it a bit for my little girl who can't stop on putting dress-up or hiding under rugs in IKEA. This is pre-crimping. Don't cringe when I say crimping. This is not that horrid triangle iron you had in 1987, this is a great 3-barrel curling iron. Don't shoot me when I say this, but DO NOT buy the cheap knock-offs of a 3-barrel curling iron found at big box stores!!!! I KNOW THIS FROM EXPERIENCE! Just don't, K! The more expensive ones have a center that lifts up, where as the cheapy's do not, and that my friend MAKES ALL OF THE DIFFERENCE IN THE WORLD!!!
Yeah, I was a skeptic too, until one of our ultra-cool babysitters corrected the error of my ways. The cheapy was given to Goodwill where someone else will have to learn from my experience.
Remember THIS twist? You'd better, because that is the only way you will be able to do this very exact hairstyle! (As a side note, the model in that tut is a year older and looks it! Happy Birthday Lana!)
Spray the hair with hairspray (a very important step) and just use the curling iron as instructed in the manual. It takes time to get used to it, I still struggle.
We modified it a bit for my little girl who can't stop on putting dress-up or hiding under rugs in IKEA. This is pre-crimping. Don't cringe when I say crimping. This is not that horrid triangle iron you had in 1987, this is a great 3-barrel curling iron. Don't shoot me when I say this, but DO NOT buy the cheap knock-offs of a 3-barrel curling iron found at big box stores!!!! I KNOW THIS FROM EXPERIENCE! Just don't, K! The more expensive ones have a center that lifts up, where as the cheapy's do not, and that my friend MAKES ALL OF THE DIFFERENCE IN THE WORLD!!!
Yeah, I was a skeptic too, until one of our ultra-cool babysitters corrected the error of my ways. The cheapy was given to Goodwill where someone else will have to learn from my experience.
Spray the hair with hairspray (a very important step) and just use the curling iron as instructed in the manual. It takes time to get used to it, I still struggle.
Subscribe to:
Posts (Atom)