Monday, February 28, 2011

Toddler Rolls to Sides Up


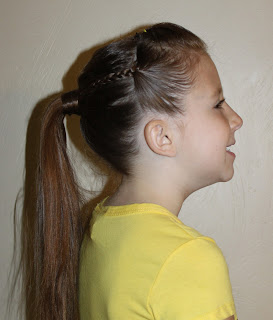
Start by making a part I always use the far lateral part and I made 4 small rolls across the front of her head as shown below.
Then take the remaning hair on both sides and pull towards the middle of her head.  **Note** Include the hair from the 4 small rolls.
Below is the top view
Last we added ringlets with a flat iron.

Wednesday, February 23, 2011

Scrunched Braid

My daughter gets so many compliments on this simple style. 
You make a simple braid we did this to hold her bangs back out of her face.
Once the braid is in place hold on the center strand and pull the remaining hair up towards her head.
Then secure with an elastic.


Tuesday, February 22, 2011

Toddler Roll Headband

This is one of the fast and easy hairstyles.  Take her hair from one ear we started on the right side and rolled across the top of her head and secured the end with an elastic.
Then I made ringlets with the flat iron and added a flower for accessories.


Vintage Curls


This style is a throwback to the days of marcel curls and push-pins. Perfect for the vintage or retro bride.

Wednesday, February 16, 2011

Poof, Braids and Ponytail

Start by making a poof in the front of her head. I used 2 small bobbie pins crossing each other to give it a little bit bigger poof.
Take the right side hair as shown below and make a braid.
Make the same braid on the left side and secure both braids and the remaining hair into a ponytail.
I took a small amount of hair and wrapped around the ponytail and secure.

Saturday, February 12, 2011

Heart Rolls

This idea was taken from Angela's cute posts on Facebook. 
Start by making a down the center part.  At the back of the part make a roll going back towards the front of her head.  Continue the roll around towards the ear and back to the center of her head. As shown below.  (I hope this makes sense if not please ask questions.) 
 Do a 2nd roll on the other side of her head.  Attach both rolls with an elastic down low and into a V shape.

Friday, February 11, 2011

Thursday, February 10, 2011

More Heart Fun

This was a fun and best of all a really easy hear to make.  So if your in a hurry this is the style.
Start by making a V shaped poof in the front of her head.
Then take a really small amount of hair just below the poof and half of your hair in the poof and secure with an elastic as shown below.
Do the same on the other side.  Then take the ends of the hair and pull them down low an centered and secure with an elastic. 


Toddler Valentines

This is not really a Valentines style but this was the hair and outfit my toddler picked out for school today. 
Today is their Valentines Party.  I was shocked when she said we could do pigtails.  She doesn't know that she has 4 elastics in.  She told me I could do 2.
Her hair was  put into small elastics holding up the bottom of her hair up.  Then those were pulled into pigtails. 
We also put in Valentines Bows to top off the style. 
As you can see from the pictures she is all attitude.

Toddler Single Heart

This is the same as the Single Heart 
We topped hers off by making ringlets with a flat iron. 

Wednesday, February 9, 2011

Double Heart

This is very similar to the Single Heart  and the steps are very much the same.
With the double heart make to small parts instead of one larger part.  Then pull the hair upward between the elastic.  Do the same steps for the 2nd ponytail.
I once again rolled the hair to make it easier to manage. 
Secure the ends of each ponytail with its own elastic.
Then pull the 2 hearts together and secure with an elastic as shown below.

Single Heart

    This is a fun and simple Valentines hairstyle.
Take a small amount of hair and pull it into a ponytail as shown below.
 Next take and make a part in between the elastic and flip it upwards.
 Then take the hair in the ponytail and split it in 2 pieces.  I rolled each piece just so I had better control.
Then secure the bottom of the 2 pieces of hair with an elastic as shown below.


Thursday, February 3, 2011

Toddler 3 rolls to Sides Up

First wet the hair this will keep the rolls in place better.  Then I made 3 rolls across the front top of her head as shown below.  I used small bobbie pins to keep them in place until I secure the sides up.
 Once the rolls are in place take both sides of her hair and pull over the top of the rolls and secure all the hair with an elastic.
  We finished off this style by putting ringlets in her hair with the flat iron.  Below is the only side view we could get taken.

Wednesday, February 2, 2011

Toddler Sides Rolled

Since my toddlers hair is so thin and she has such a sensitive head we do a lot of rolls.
So here is another fun cute roll style for toddlers.
I started the roll on the left side along the front (bang area) of her head and rolled it toward her ear a little then turned it back towards the center of her head as shown below. 
 Next I rolled the right side of her head back to meet the left side as shown below.
 I secured the 2 rolls together with an elastic.
 Last I used the flat iron to put ringlets in her hair.
 The finished side view below.  She asked for a flower at the last minute.